How to Choose the Best Back Splash for Your Kitchen?
Choosing the best Back Splash for your kitchen involves more than matching colors. It protects walls from water, cooking grease, steam, and accidental splashes. The right material should also suit your cooking habits, cleaning routine, budget, and kitchen layout. A beautiful surface can still disappoint if its grout stains easily or its finish shows every fingerprint.
Begin by studying the area around your sink, stove, and countertops. Porcelain tile, ceramic tile, glass, natural stone, and stainless steel each perform differently. Porcelain handles daily moisture well and usually needs less maintenance. Glass can reflect light across a dark kitchen, but it may reveal dust quickly. Natural stone creates character, though it often requires sealing and careful cleaning. Stainless steel tolerates heat and looks professional, but scratches can become part of its appearance.
Think about real use.
Measure the wall carefully before shopping. Small sample boards can look completely different under warm bulbs, daylight, and under-cabinet lighting. Bring your countertop sample when comparing colors. Also inspect grout width, edge trims, and installation requirements. These details shape the final result more than many homeowners expect.
There is no universally best Back Splash. The practical choice may not be the most fashionable one. A dramatic pattern might become tiring, while a plain tile may feel safer but less personal. Consider future repairs, replacement tiles, and professional installation costs. Reliable planning means balancing appearance with durability, hygiene, maintenance, and honest expectations. A kitchen should look inviting, but it must also survive busy mornings and messy dinners.
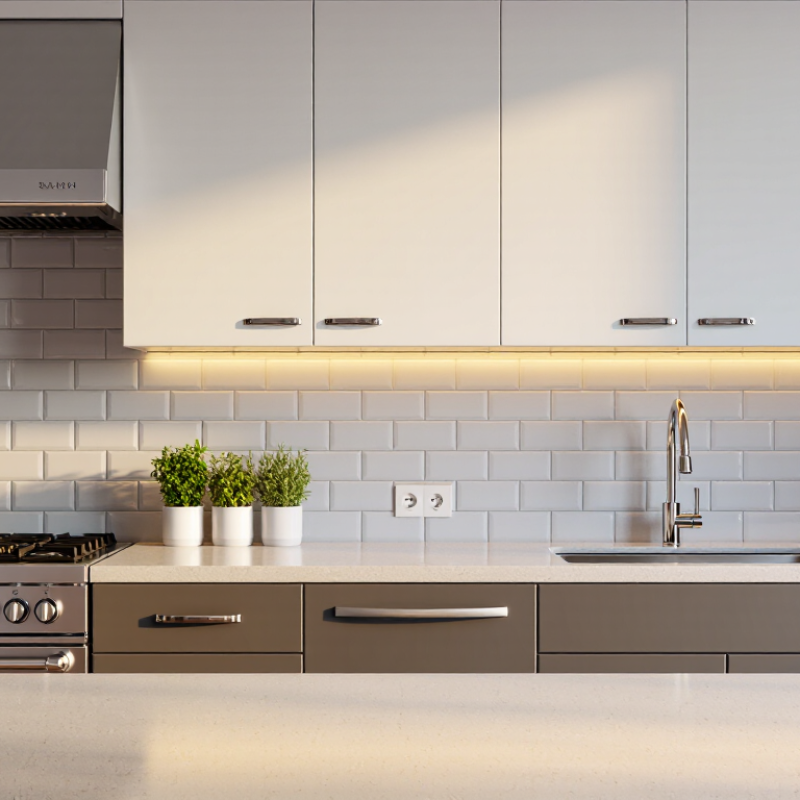
Define Your Kitchen’s Backsplash Needs and Design Goals
Before choosing a backsplash, define what your kitchen must withstand. A busy family kitchen needs resistance to grease, steam, splashes, and frequent wiping. A decorative kitchen may prioritize texture or color instead. Houzz’s 2024 U.S. Kitchen Trends Study reports median spending of $60,000 for major remodels in large kitchens and $41,000 in smaller kitchens. That difference makes budget planning essential. Set a backsplash allowance before selecting premium stone, intricate patterns, or custom edges.
Measure the wall height, outlet positions, range width, and areas behind small appliances. Use a sample near your countertop, cabinet, and flooring. Check it in morning and evening light.
Glossy surfaces can brighten a dark wall, but they may reveal fingerprints. Textured tile adds depth, yet its cleaning needs are easy to underestimate. The Tile Council of North America recommends selecting installation systems suited to the substrate and moisture exposure. A beautiful material can still fail with poor preparation. That part is often ignored.
Tips: Choose low-porosity surfaces near the sink and cooktop. Ask for grout samples, not only tile samples. Keep spare pieces for future repairs. Consider extending the backsplash to the underside of cabinets for easier cleaning. I would also question very delicate materials in high-use zones. They may look refined, but daily cooking can change the design quickly.
Compare Backsplash Materials, Durability, and Maintenance
Choosing a backsplash starts with daily conditions, not color alone. In kitchen assessments, I check heat, splashes, grout lines, and cleaning habits. Ceramic and porcelain tile remain practical choices. The 2024 Houzz U.S. Kitchen Trends Study identifies ceramic or porcelain tile as a leading backsplash material among renovating homeowners. These tiles resist heat, moisture, and ordinary stains when properly installed. Porcelain is denser and usually absorbs less water than standard ceramic tile. That matters behind a sink or cooking surface. Glass offers a smooth, nonporous face, but scratches and installation damage can be difficult to hide. Natural stone adds texture and variation. It also demands more attention.
Maintenance differences become obvious after several months. Cement-based grout can discolor without sealing and regular cleaning. Epoxy grout resists staining better, although it costs more and requires careful installation. The Natural Stone Institute recommends sealing porous stone according to the material and manufacturer’s guidance, not on an automatic yearly schedule. That advice is easy to overlook. The Tile Council of North America also stresses correct substrate preparation and movement joints for durable tile installations. A beautiful tile can still fail over flexible drywall or poorly prepared surfaces. I once underestimated grout color; pale grout looked elegant, then showed cooking residue quickly. The better choice depends on cleaning tolerance, ventilation, joint width, and repair access. Check samples beside your stove, under real lighting, before ordering.
Choose Colors, Patterns, and Textures That Match Your Kitchen
A kitchen backsplash should support the room, not compete with it. Start by studying your cabinets, worktops, flooring, and natural light. Warm wood usually suits cream, sand, or muted green tones. Cool gray cabinets can handle white, blue, or charcoal accents. Hold sample tiles beside the sink and cooking area. Colors change noticeably under morning and evening light.
Patterns need careful control. A small kitchen may feel larger with narrow vertical tiles or gentle, repeated shapes. Large geometric designs can create drama, but they may overwhelm crowded walls. I once selected a bold pattern without checking the grout lines. The result looked busy near the shelves. That mistake taught me to view samples from several feet away. Less can be stronger.
Texture adds depth through gloss, roughness, or handmade variation. Glossy surfaces reflect light and wipe clean easily around cooking zones. Matte tiles feel calm but may show grease more clearly. Uneven surfaces create character. They also collect dust. Choose a texture you can maintain every week, not just admire in a showroom. Keep grout color close to the tile for a quiet effect, or use contrast to highlight the layout. A small sample is useful, but a larger test area gives more reliable evidence.
Measure the Wall Area and Plan the Installation Layout
How to Choose the Best Back Splash for Your Kitchen?
A beautiful backsplash begins with accurate measurements, not tile samples. Houzz’s 2024 U.S. Kitchen Trends Study reports that backsplash upgrades remain a common kitchen renovation choice. Measure the wall’s width and height in several places. Walls are rarely perfectly straight. Record windows, outlets, cabinets, and exposed corners. Multiply width by height, then subtract large openings. Add at least 10% for cuts, breakage, and future repairs. Complex patterns may require 15% extra.
Plan the installation layout before buying materials. Mark the visual center of the main wall, then dry-lay several rows on the floor. This reveals awkward slivers near cabinets and countertops. Professional tile guidance from the Tile Council of North America emphasizes a sound, clean substrate and proper movement accommodation. Do not cover loose paint, damp drywall, or uneven surfaces. That shortcut often becomes an expensive repair. I prefer starting with a full tile near the most visible edge, but every kitchen has different focal points. A rigid rule can still look wrong.
Tips: Measure twice. Photograph every outlet. Use spacers during the dry layout. Keep grout lines aligned with cabinet edges when possible. Check the countertop slope before setting the first row. A small mistake there travels upward. Allow adhesive and grout to cure according to their technical data sheets. Your first layout may need revision; that is normal, not failure.
How to Choose the Best Backsplash for Your Kitchen?
Measure each wall section before choosing tile. This example compares the measured backsplash area with the tile coverage to plan for 10% installation waste.
Planning note: The backsplash height is 18 inches for all sections. Tile coverage is calculated as measured area multiplied by 1.10 to allow for cutting, breakage, and pattern matching. Measure your own wall sections and replace the sample values before purchasing materials.
